


服务热线
15527777548/18696195380

发布时间:2018-03-21
简要描述:
本文作者:i春秋作家HAI_ZHU
HAI_的使用手册(各种好东西)0x00 前言Dalvik模式是Android 4.4及其以下采用的模式,之后到了Android 5.0 之后就是ART模式,关于这两个模式的详细内容,...
本文作者:i春秋作家HAI_ZHU
0x00 前言
Dalvik模式是Android 4.4及其以下采用的模式,之后到了Android 5.0 之后就是ART模式,关于这两个模式的详细内容,请自行百度,如果在文章看不来的地方,可以翻翻之前的文章。如果有问题也可以私聊我。
废话不多说,直接上操作。
内容:demo 动态 dump 出 dex文件
1.系统 小米 9.0
2.ida 7.0


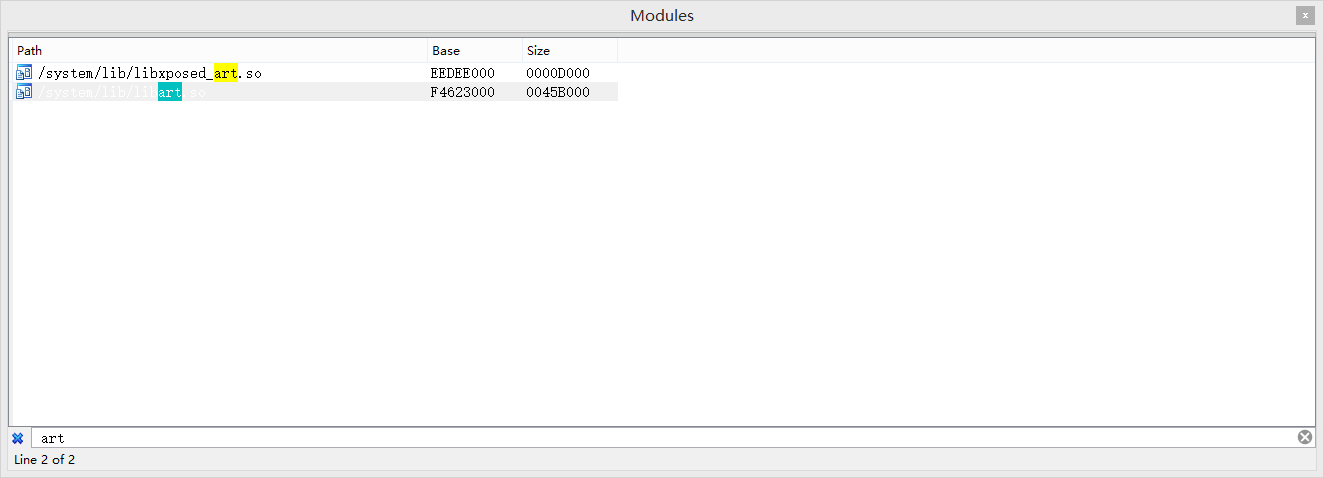
搜索art
PS:小知识
Android 4.4版本之前 系统函数在libdvm.so
Android 5.0之后 系统函数在libart.so
在libart.so中搜索Openmemory函数并且跟进去。
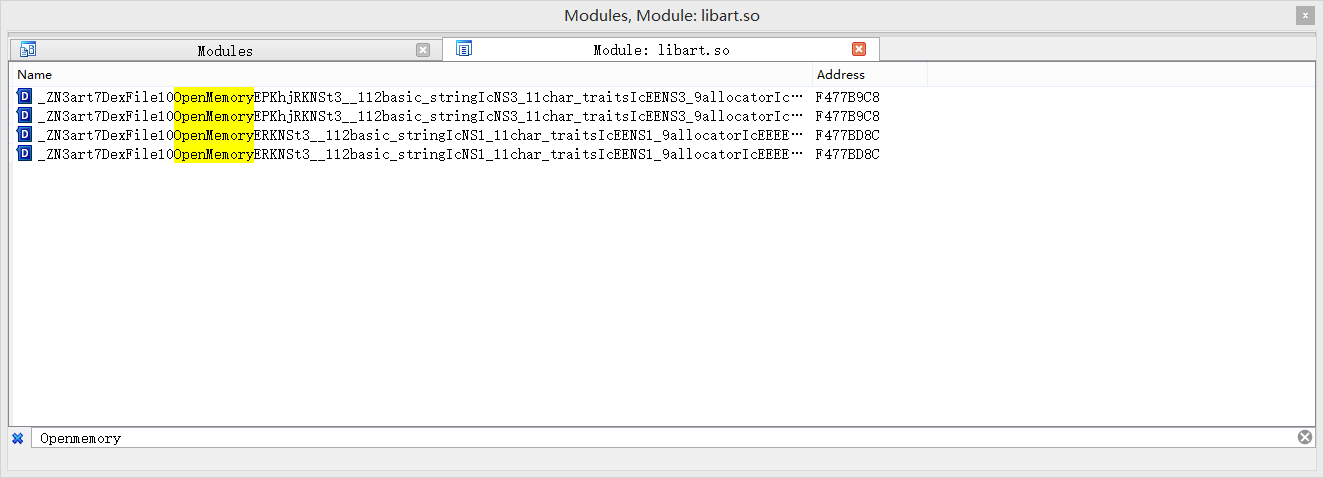
PS:小知识
一般来说,系统dex都会在这个函数中进行加载,但是会出现一个问题,后面说。
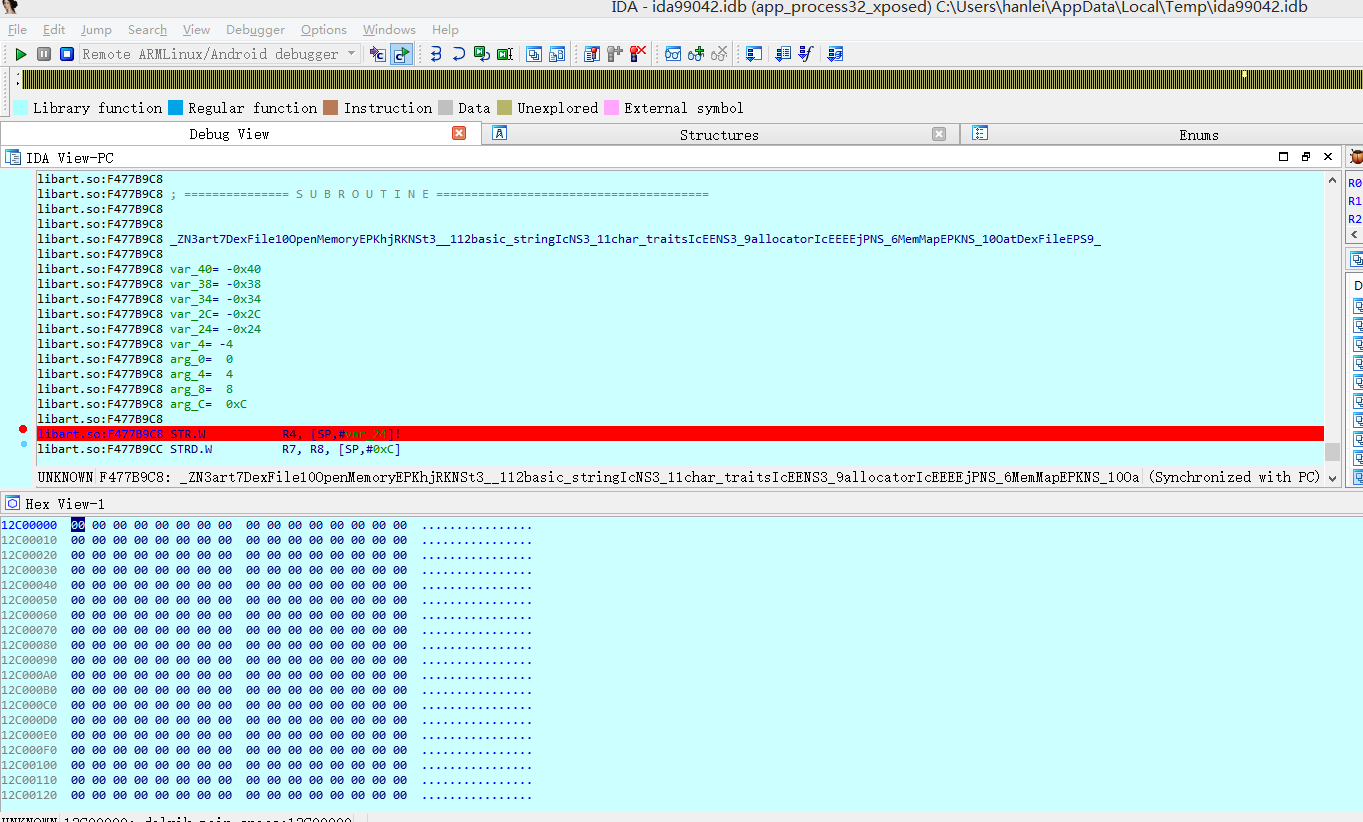
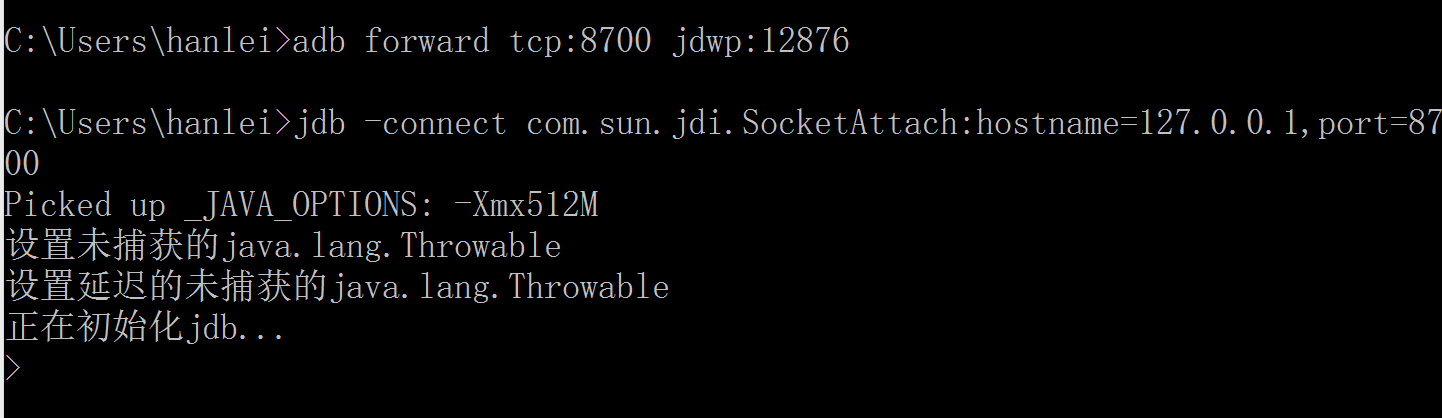
成功下断,并且运行到我们下断的地方。
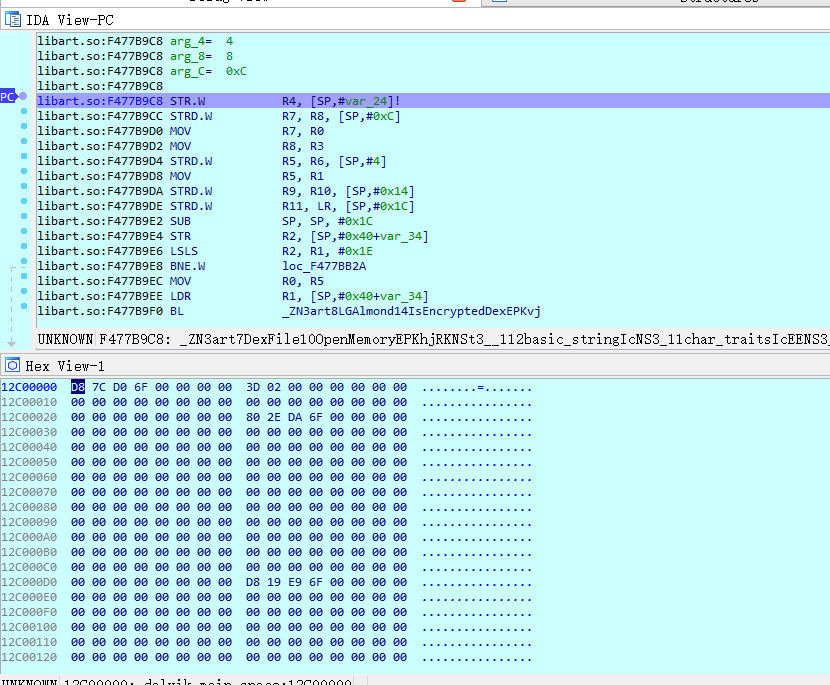
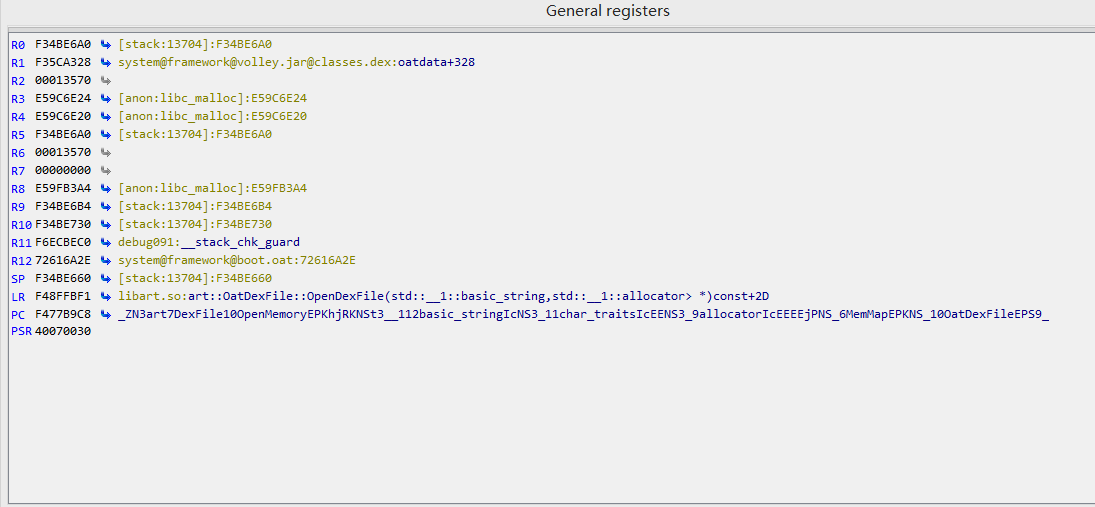
打开寄存器窗口,可以看到R1就是我们的dex
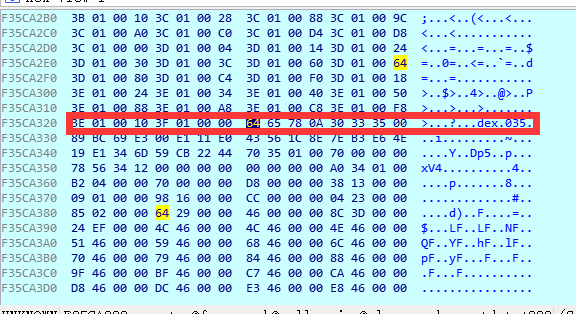
然后在Hex窗口打开R1。
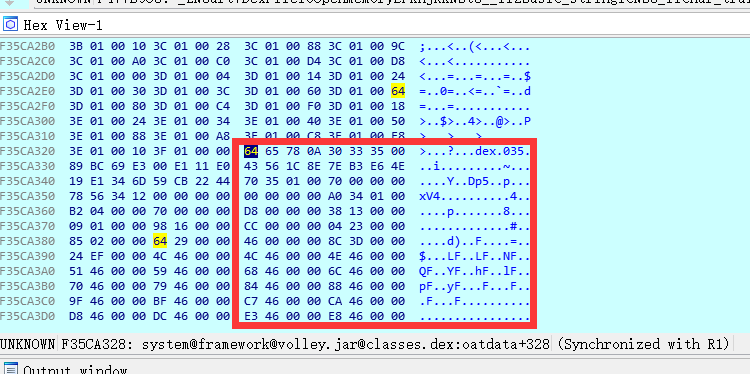
很明显就看到了dex文件的二进制结构。如果不明白可以看看之前的dex文件分析。
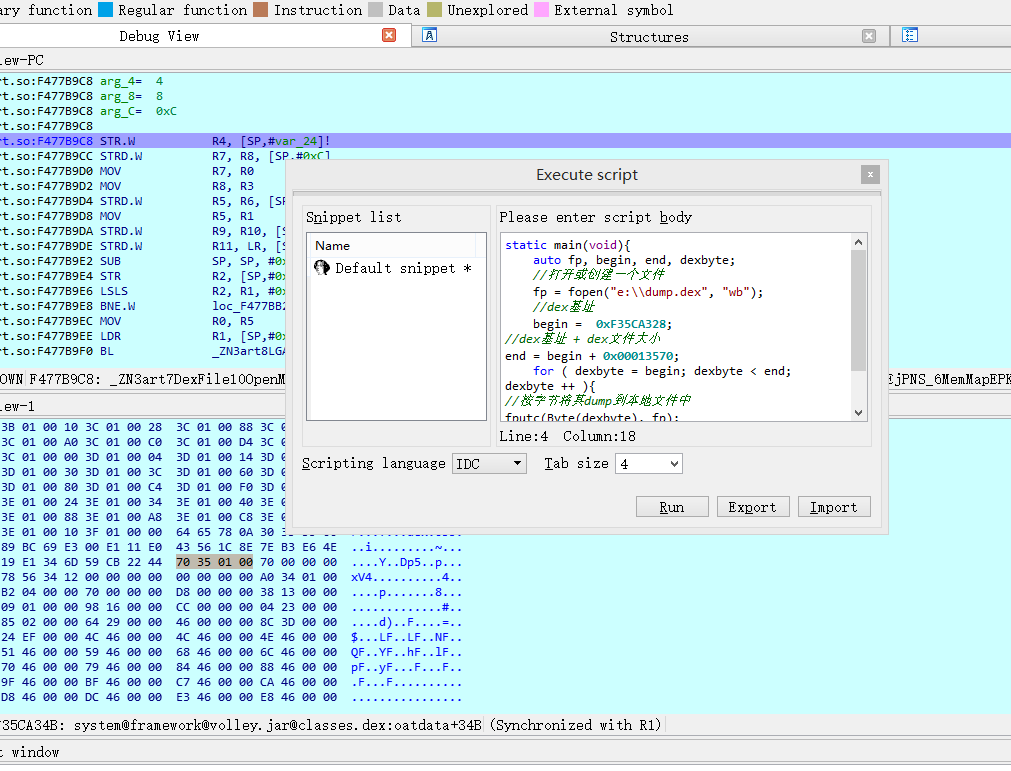
第一个关键信息:地址偏移:0xF35CA328
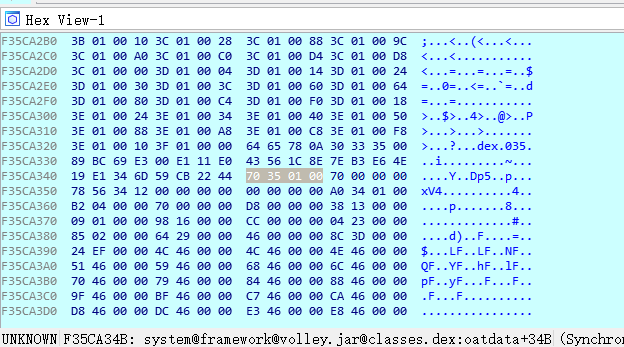
第二个关键信息:文件偏移:70 35 01 00,转换一下就是 0x00013570
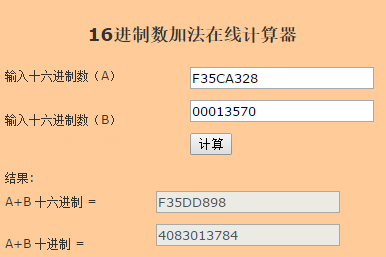
使用16进制加法器进行相加,F35DD898
static main(void){ auto fp, begin, end, dexbyte; //打开或创建一个文件 fp = fopen("d:\\dump.dex", "wb"); //dex基址 begin = 0xF34C6320; //dex基址 + dex文件大小end = begin + 0x00013570; for ( dexbyte = begin; dexbyte end; dexbyte ++ ){//按字节将其dump到本地文件中fputc(Byte(dexbyte), fp); }}
脚本填写好了之后,点击run即可。

这里dump出来的dex还是和原来的dex有一些区别的,要进行一些修复才可以。关于修复的内容还在探讨中,如果有大佬路过指教一二,感激不尽。
如果您有任何问题,请跟我们联系!
联系我们
Copyright © 武汉网盾科技有限公司 版权所有 备案号:鄂ICP备2023003462号-5
地址:联系地址:湖北省武汉市东湖新技术开发区武大科技园兴业楼北楼1单元2层